Warema blinds with Home Assistant
This is a little walkthrough guide on setting up Home Assistant to control Warema blinds (and more) using the Warema WMS Stick. With a little technical background in Linux this is not a big deal, but documentation is a bit sparse, so this might fill in a gap.
Background
Warema blinds and remote controllers
Last year in late autumn we got a couple of blinds from Warema, which are all remote controlled. In total seven blinds have been installed. They organized and controlled as follows:
-
In two rooms we got two top-mounted roller shutters – one at a window and one at a door in each room. Each room is controlled by 6 channel remote control called WMS Hand-held transmitter plus. Each handheld has three channels programmed: one for each blind and a third forming agroup of both blinds.
-
In the living room we got three front-mounted zip awnings. One for the door to the garden, one for a large window and a third one for a window in the first floor in a half working area. Two remote controls are in place: Again a 6 channel remote control for the three and a single channel WMS Hand-held transmitter basic for the working area in the first floor only.
At the Warema website you find the WMS practice manual that explains how to program the remote controls, i.e., how to assign motors to channels, how to form groups, but also how to set up wind monitoring or sensors.
Home Assistant
Most years I have some x-mas project running, and this year was setting up Home Assistant on a Raspberry Pi. After we got smart metering I identified the water boiler in the kitchen to be a significant consumer and now I felt it is time for some Shelly Plug S to turn it off during night or when we are not at home. It would pay off soon.
And you know how this goes: Once you have Home Assistant running, you keep adding stuff. Flood control, integration of the temperature, humidity and air pressure sensors, and so on. And, of course, one would like to be able to control the Warema blinds. In particular I imagined what would happen if the blinds would go down while we are in the garden, say, because kids found the remote control. At least with our phones we could simply open them again.
Warema on Home Assistant
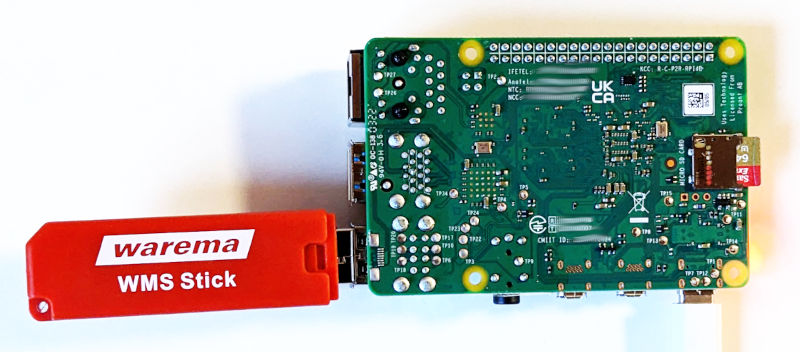
Warema WMS Stick
There are of course solutions from Warema to smartify their products, e.g., WMS Cube and WMS WebControl pro. But we want to enable our Home Automation on the Raspberry Pi to do exactly that. Luckily, there is also the Warema WMS stick for this 2.4 GHz radio protocol, which is actually used by service technicians to program the remote controls.
This USB stick provides a serial interface and in recent years people implemented libraries that implemented the serial protocol to control the stick. A starting point seems to have been this iobroker forum.
Home Assistant addon
At least this source is mentioned by Marco Santarelli in a Home Assistant addon on github called addon-warema-wms1. The README.md comes with instructions that are sufficient to get it running, but do not exactly constitute a tutorial.
What the addon essentially does is providing is a MQTT to Warema WMS bridge: It sends Warema status information as MQTT messages, like the positions of the blinds. And vice versa, it takes MQTT messages to control the blinds, like setting positions.
Installation instructions
For the Warema addon to work you need some MQTT server. The default option would be to simply install one as Home Assistant addon.
Step. Install the Mosquitto broker at Home Assistant.
The Mosquitto installation of Home Assistant needs a user and some configuration files to be configured if you want to subscribe to MQTT messages on this server, say, from your laptop. (Details are found at the bottom of the documentation of the addon.) Do the following:
Step. Add a user mqtt at Settings/People/ and choose some password.
Step. Start a terminal2 or by whatever means create3 the following two files with the following content:
➜  cat /share/mosquitto/accesscontrollist
user addons
topic readwrite #

user homeassistant
topic readwrite #

user mqtt
topic readwrite #
➜  cat /share/mosquitto/acl.conf
acl_file /share/mosquitto/accesscontrollist
Step. In the configuration of the Mosquitto broker add-on enable the customization and set
active: true
folder: mosquitto
Now we could actually test whether the MQTT broker works using mosquitto_sub.
And we can keep it running and will see Warema messages in a few minutes.
Optional step. On your computer run
❯ mosquitto_sub -h HOMEASSISTANTHOST -p 1883 -u mqtt -P YOURPASSWORD -v -t "warema/#"
Now we are ready to install the Warema addon.
Step. Go to Settings/Add-on/ and click “add-on store” on the right
bottom. In the add-on store you click on the hamburger menu on the top right
and choose “Repositories” to add
“https://github.com/santam85/addon-warema-wms”.
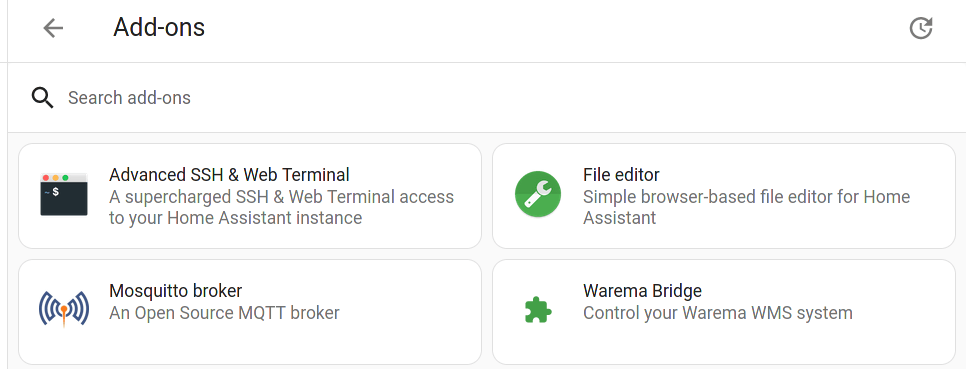
After installing the addon and switching to Settings/Add-on/ then we shall
see the addon:
Now we need to configure the addon. Here we essentially follow the instructions
of the addon
README
to eventually get the values for wms_key, the wms_pan_id and wms_channel.
Step. First check that the wms_serial_port is set and set to wms_pan_id
to “FFFF”.
Also prepare to have a Warema WMS Handheld transmitter at hand for the next step.
Step. Restart the addon and switch to the Log tab. Press refresh until you eventually get the output mentioned in the README:
Starting getting network parameters...
- Open the battery case of the WMS Handheld transmitter.
- Select the channel using the (+) button.
  Notice: If an unassigned channel is selected, press the (+) button for 5 s.
          As soon as the LED flashes, all channels can be selected by
          pressing the (+) button again
- Press the learn button in the battery case of the WMS Handheld
  transmitter for approx. 5 s. LEDS go green; the transmission LED flashes.
  For several seconds, the WMSHand-held transmitter plus scans the operating
  range for devices.
- Each time when scanning stops with red LED perform steps:
  1)  When you press the control button (A), you can check WHICH target device
      was just found.
  2) If you can *not* see the output
       "*** Waving and Hello!"
     on the screen after pressing (A) another device than the WMS Stick has
     been found. Press the (C) button to switch to the next receiver.
  3) If you can see the output
       "*** Waving and Hello!"
     on the screen after pressing (A) then the WMS Stick has been found.
     Press the STOP button to assign the WMS Stick to the channel. After
     pressing STOP the network parameters are displayed on the screen.
Follow these instructions and maybe press refresh occasionally to see the responses in the log. If you have been successfully following the instructions you will get an output in the log that looks like this
*** WMS Network parameters successfully detected:
    Channel: 17
    PanId:   1A2B
    Key:     0123456789ABCDEF0123456789ABCDEF
- Write down and remember the network parameters.
- Briefly press the learn button on the back of WMS Handheld transmitter to
  stop the scanning process.
- Press Ctrl-C to stop program.
These are the parameters we need to configure the addon.
Step. Set wms_key, wms_pan_id and wms_channel with the values in the
log output.
Step. Restart the addon.
In the log you should see output that your Warema devices have been found. It will be lines like
Scanned devices.
Registering xxxxxxx
Adding device xxxxxxx (type 25)
Registering xxxxxxx
Adding device xxxxxxx (type 25)
Registering xxxxxxx
Adding device xxxxxxx (type 25)
Registering xxxxxxx
Adding device xxxxxxx (type 25)
Registering xxxxxxx
Adding device xxxxxxx (type 25)
Registering xxxxxxx
Adding device xxxxxxx (type 25)
Registering xxxxxxx
Adding device xxxxxxx (type 25)
[
  { snr: xxxxxxx, snrHex: 'HEXHEX', name: 'xxxxxxx' },
  { snr: xxxxxxx, snrHex: 'HEXHEX', name: 'xxxxxxx' },
  { snr: xxxxxxx, snrHex: 'HEXHEX', name: 'xxxxxxx' },
  { snr: xxxxxxx, snrHex: 'HEXHEX', name: 'xxxxxxx' },
  { snr: xxxxxxx, snrHex: 'HEXHEX', name: 'xxxxxxx' },
  { snr: xxxxxxx, snrHex: 'HEXHEX', name: 'xxxxxxx' }
]
Dashboard
This is the point where Home Assistant should have eventually recognized your
blinds automatically, which you can now use. Also in the window with
mosquitto_sub, if you have it still open, should have shown some messages.
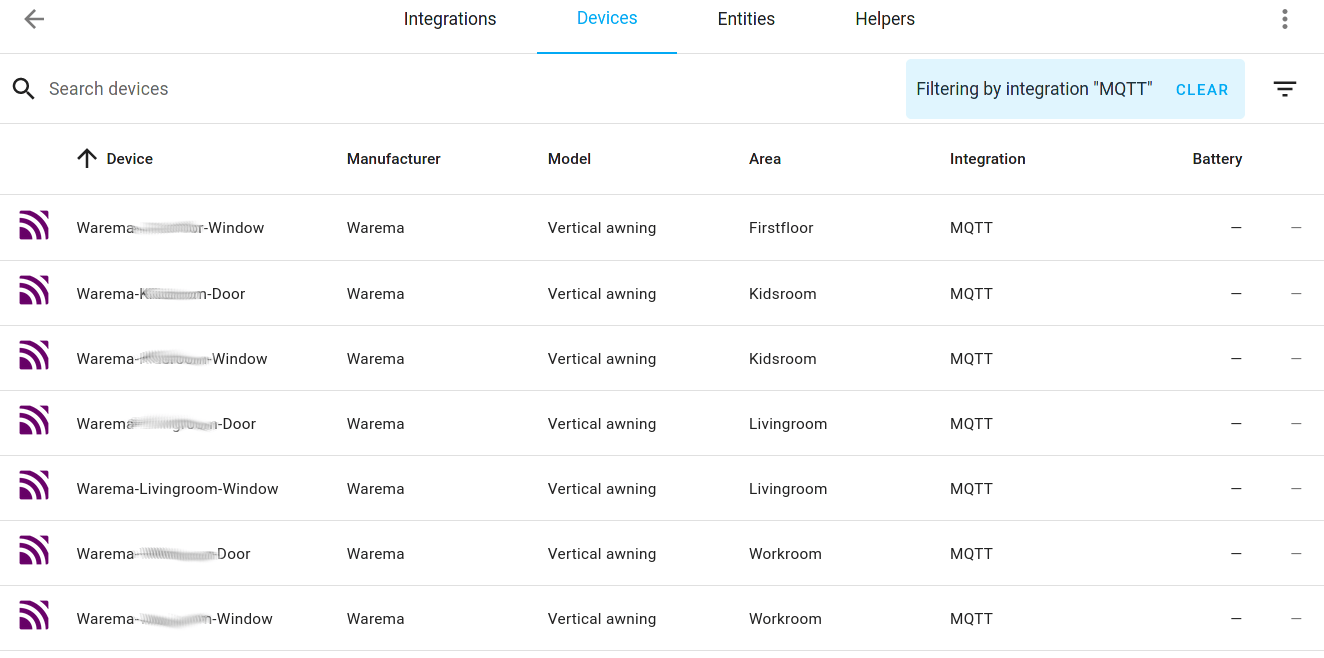
Go to Settings/Devices & services/MQTT and open the devices list. It should
be populated now.
If you prefer, you can rename them to have more meaningful names that hint for the positions, like “Warema-Livingroom-Window” or so.
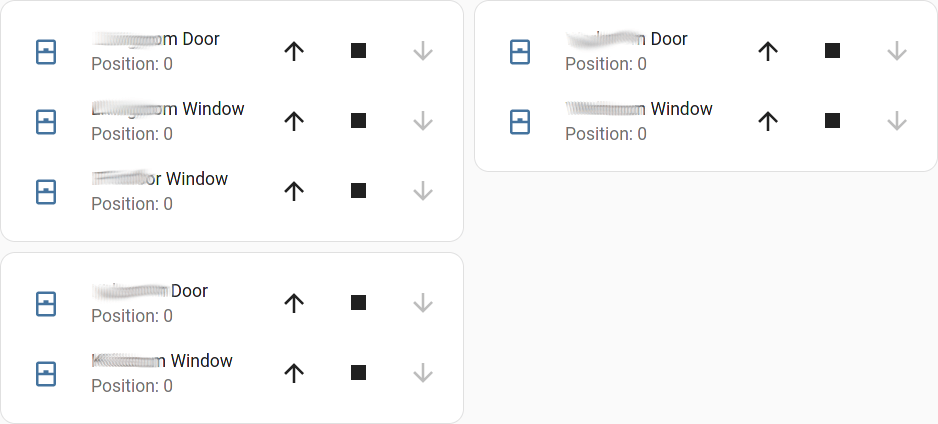
Now it is only a matter of adding these devices to a dashboard. For instance, you may add an “Entities” card and add the devices from above. I have added three “Entities” cards, one for each room:
MQTT
If you move the blinds with the handheld control you will see output in the
terminal with mosquitto_sub running:
❯ mosquitto_sub -h HOMEASSISTANTHOST -p 1883 -u mqtt -P YOURPASSWORD -v -t "warema/#"
…
warema/xxxxxxx/availability online
warema/xxxxxxx/availability online
warema/xxxxxxx/availability online
warema/xxxxxxx/availability online
warema/xxxxxxx/availability online
warema/xxxxxxx/availability online
warema/xxxxxxx/position 100
warema/xxxxxxx/tilt 171
warema/xxxxxxx/position 100
warema/xxxxxxx/tilt 171
warema/xxxxxxx/position 100
warema/xxxxxxx/tilt 171
warema/xxxxxxx/position 100
warema/xxxxxxx/tilt 171
warema/xxxxxxx/position 100
warema/xxxxxxx/tilt 171
warema/xxxxxxx/position 100
warema/xxxxxxx/tilt 171
…
warema/xxxxxxx/set OPEN
warema/xxxxxxx/position 0
warema/xxxxxxx/tilt NaN
warema/xxxxxxx/set STOP
warema/xxxxxxx/position 90
warema/xxxxxxx/tilt 171
warema/xxxxxxx/set CLOSE
warema/xxxxxxx/position 100
warema/xxxxxxx/tilt NaN
We can also change the position of a blind xxxxxxx to 50 (out of 100) by
sending a MQTT message:
❯ mosquitto_pub -h HOMEASSISTANTHOST -p 1883 -u mqtt -P YOURPASSWORD -t warema/xxxxxxx/set_position -m 50
In the source of the addon you will find a list of MQTT messages:
-
set,position,tiltare reported as status -
set_position,set_tiltcan be used to set position and tilt (if applicable).
Positions are in the range from 0 to 100. The tilt is in the range from -100 to 100.
-
This again is a fork of giannello/addon-warema-bridge. This repository, however, is about three years behind. ↩
-
Install the addon “Advanced SSH & Web Terminal”. You may activate the option “Show in sidebar” for convenience. ↩
-
For instance, use the vi or nano editor. ↩